


-
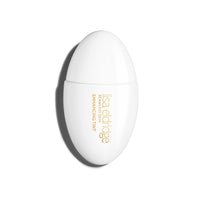
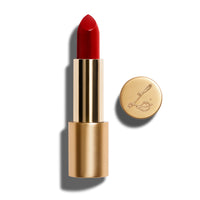
 NEW! Rouge Experience
Refillable Lipstick
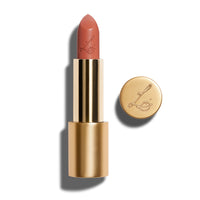
NEW! Rouge Experience
Refillable Lipstick
-
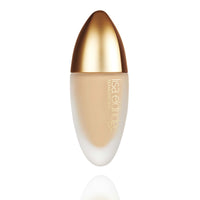
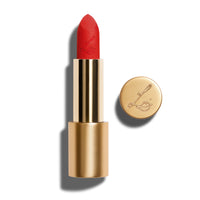
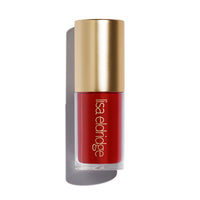
 NEW! Rouge Experience
Refill
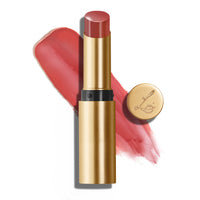
NEW! Rouge Experience
Refill
-
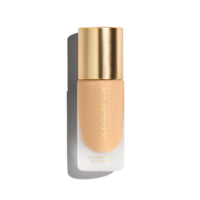
 True Velvet
Lip Colour
True Velvet
Lip Colour
-
 Luxuriously Lucent
Lip Colour
Luxuriously Lucent
Lip Colour
-
 Insanely Saturated
Lip Colour
Insanely Saturated
Lip Colour
-
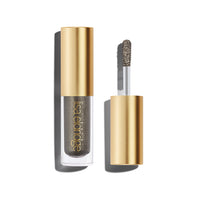
 NEW! Velveteen
Liquid Lip Colour
NEW! Velveteen
Liquid Lip Colour
-
 Velatura Balm
Dewy Lip And Cheek Stick
Velatura Balm
Dewy Lip And Cheek Stick
-
 Baume Embrace
Melting Lip Colour
Baume Embrace
Melting Lip Colour
-
 Gloss Embrace
Lip Gloss
Gloss Embrace
Lip Gloss
-
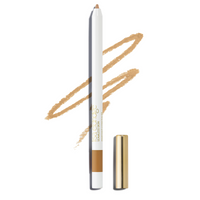
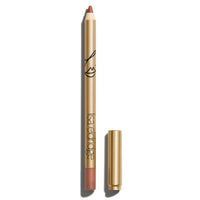 Enhance and Define
Lip Pencil
Enhance and Define
Lip Pencil
-
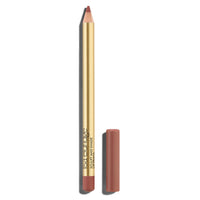 Sculpt and Shade
Lip Pencil
Sculpt and Shade
Lip Pencil


You’re currently on our international website. US customers, please shop our US website.
My latest videos

New Complexion And Colour Launch! My Marilyn Monroe Centenary Collection

Beat the Crease: The Trick You Need For Crease-Free Under Eyes

Korean Skincare - My Favourite Viral Products Deep Dive!

First Look! | 3 New Seamless Shades

This Makeup Mystery has Driven Me CRAZY!!!
Fix your Bronzer for Spring in 60 Seconds

Welcome to My World - Come On a Studio Tour With Me!

NEW LAUNCH! Renaissance Technique meets Modern Balm - My New Everyday Lip and cheek stick is here!

When You Finally Understand Why Nothing Looks Right on Your Skin - Olive Skintones Part 2

Lifted Liner for Hooded, Uneven or Asymmetric Eyelids

The Beauty of Vulnerability - Getting Ready & Getting Real with Posy Sterling

Alexa Chung and the Viral Palette You’ve Been Waiting For

New Shades of Liquid Silks and Pinpoint, as requested by YOU!

Olive Undertones… what are they and do YOU have them?!
 For 2025!")
Favourite Things (New and Old) For 2025!
My portfolio

Sergei Polunin - Vogue Germany - Luigi and Iango

Sergei Polunin - Vogue Germany - Luigi and Iango

Sergei Polunin - Vogue Germany - Luigi and Iango

Sergei Polunin - Vogue Germany - Luigi and Iango

Sergei Polunin - Vogue Germany - Luigi and Iango
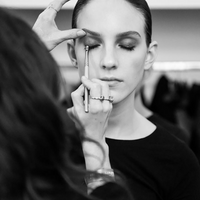
I love blush! My Pro Tips and Tricks
A sweep of blusher is one of the fastest ways to make yourself look fresher and more alive, whatever your skin tone. Like a flick of mascara, it can take you from lifeless to radiant in seconds. It's also one of the makeup products I'm asked about most often, from choosing the right shade to picking the perfect texure. So whether you go for a hint of apricot, a dash of raisin or a pop of fresh neon pink, this is how you can make blusher work for you...
Think colour - not contour
Blusher is about adding colour and dimension, not contouring or sculpting, although, not unlike contour, where you apply it is dependent on your face shape. As a general guideline, if you have a round face, blusher works best if you brush it on in a big, soft 'C', starting on your cheekbones and sweeping up to your temples. If you have a long face, focus more on the apples of your cheeks, creating a soft cloud of colour around the centre of your face to break up the length. If you have an oval-shaped face you can pretty much get away with applying colour anywhere.
Don’t go overboard
I like blush to look like it’s radiating from within, rather than sitting unnaturally on the surface, so less is definitely more - and it's always better to build up slowly than to put too much on then have to try and tone it down.
To keep blush looking 'real', I often apply a tiny amount after foundation, finish the rest of the make-up and then add more blush if it's needed (this is a great failsafe when you’re wearing a strong shade of lipstick and want to make sure your lips and cheeks aren’t in competition). If you have high colouring, concentrate on concealing any redness/uneveness before applying blush - set the coverage with powder and then gently sweep on a powder blush.
Colour codes
As a basic rule of thumb, for a natural effect choose a blush that blends in with your natural undertones - so blue-toned pinks will suit a cooler skintone, while peachy corals work well on olive skins and anyone with yellow undertones. However, I often like to contrast - a cool toned, blue-pink blush looks amazing on a warm, olive skin for example, as the contrasting tones make the blush really pop. I also find that matching your blusher to your lip tone gives a pretty, polished effect.
While I don't like colour 'rules', and blusher is no exception, some combinations are best avoided. I don't like to use red lipstick with a bronzed-toned blush as it can look 'muddy', and likewise I avoid teaming blue-toned pinks with coral as it can look 'off'.
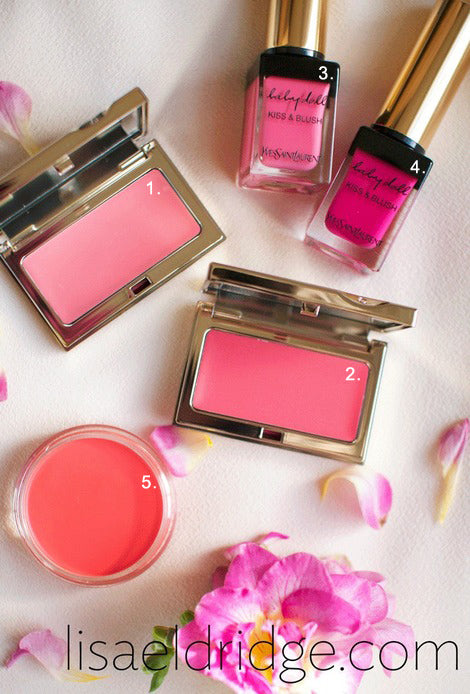
Creams (first image)
Picking the right blush texture is as important as getting the shade right. Creamy blushers are my favourite for creating a really natural effect. I love how they melt in, have a slight sheen, and work on almost every skin type (the exceptions are very oily or blemish-prone skin where powder is preferable).
Clarins Multi-Blush Compact (available in four shades, Candy 1 and Grenadine 2 above) has a lightweight texture that glides onto skin and is really blendable, perfect for a very natural flush. YSL Babydoll Kiss & Blush (available in a great range of 12 shades, Rose Frivole 3 and Fuchsia Desinvolte 4 above) works well on lots of different skintones and the buildable formula has a velvety matte - but not flat - finish. On shoots, I love Revlon PhotoReady Cream Blush (available in four shades) - the bright pink Flushed (sadly no longer available in the UK) pops on dark skin and Coral Reef (5) looks beautiful against light olive and pale yellow toned skin (see more of my favourite kit cream blushes in my film).
Powders (second image)
Powder blushers are great for normal, oily or combination skin, and work well on all but the driest skins. I have lots of favourite powder blushes but one of my must-haves is Chanel Joues Contraste Powder Blush (available in 15 shades). Two shades I reach for again and again are super-bright Pink Explosion (6) and Rose Initiale, which I’ve used on countless celebrities and models as the warm apricot-rose colour suits practically every skin tone.
For darker skins, I’m a fan of Tom Ford Cheek Colors as they're highly pigmented and come in six gorgeous shades (I especially like Savage 7 and Frantic Pink 8). And for an instant hit of prettiness, Clinique’s Cheek Pops (available in 12 shades, Plum Pop 9 and Pink Pop 10 above) deliver a radiant flush of blush - and who can resist that super-cute packaging?!
Gels (third image)
Gels and stains are longer lasting than creams and powders, but the downside is that they aren’t as mistake-proof or easy to blend. Always apply them to a slippy surface (definitely not on top of mattifying primer or powder) and blend quickly with warm fingertips. Benefit Benetint (11) was one of the first blush stains to launch and gives cheeks a really fresh, outdoorsy blush. For oilier skins, I like Becca Beach Tint (available in eight shades, Hot Pink 12 above) as it's a silicone-based gel - also perfect for holidays and summer as the formula is waterproof.
If you like the sheerness of gels and stains, but want something with a bit more shimmer, Daniel Sandler Watercolour Blush (available in 16 gorgeous shades, Chelsea 13 above) is one of the best formulations I’ve tried. It’s water-based so has plenty of 'slip' and can be blended easily for natural-looking rosiness.
Watch My Pro Kit - Cream Blush film below to find out more about some of my favourite cream blushers...
Products I have used in this video:
Click below for more info and buying options on the products I have used in this film. Some of the links provided are affiliate links for which I will receive a small percentage payment for any purchases made.
Becca - Beach TintBenefit - Benetint
Chanel - Powder Blush
Clarins - Multi Blush - Cream Blush
Clinique - Cheek Pop
Daniel Sandler - Watercolour Blush
Revlon - Photoready Cream Blush
Tom Ford - Cheek Color
YSL - Baby Doll Kiss & Blush


