


-
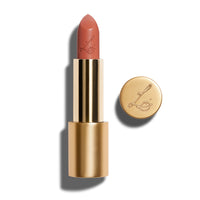
 NEW Rouge Experience
Refillable Lipstick
NEW Rouge Experience
Refillable Lipstick
-
 NEW Rouge Experience
Refill
NEW Rouge Experience
Refill
-
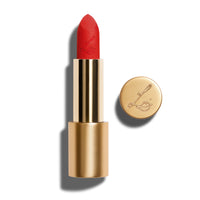
 True Velvet
Lip Colour
True Velvet
Lip Colour
-
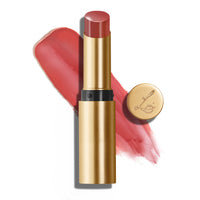
 Luxuriously Lucent
Lip Colour
Luxuriously Lucent
Lip Colour
-
 Insanely Saturated
Lip Colour
Insanely Saturated
Lip Colour
-
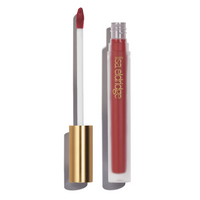 Velveteen
Liquid Lip Colour
Velveteen
Liquid Lip Colour
-
 Velatura Balm
Dewy Lip And Cheek Stick
Velatura Balm
Dewy Lip And Cheek Stick
-
 Baume Embrace
Melting Lip Colour
Baume Embrace
Melting Lip Colour
-
 Gloss Embrace
Lip Gloss
Gloss Embrace
Lip Gloss
-
 Enhance and Define
Lip Pencil
Enhance and Define
Lip Pencil
-
 Sculpt and Shade
Lip Pencil
Sculpt and Shade
Lip Pencil


You’re currently on our international website. US customers, please shop our US website.
My latest videos

The Story of Green - Ancient World to Modern Makeup

Not Your Average Makeup Shop … Come Take a Look!

New Complexion And Colour Launch! My Marilyn Monroe Centenary Collection

Beat the Crease: The Trick You Need For Crease-Free Under Eyes

Korean Skincare - My Favourite Viral Products Deep Dive!

First Look! | 3 New Seamless Shades

This Makeup Mystery has Driven Me CRAZY!!!
Fix your Bronzer for Spring in 60 Seconds

Welcome to My World - Come On a Studio Tour With Me!

NEW LAUNCH! Renaissance Technique meets Modern Balm - My New Everyday Lip and cheek stick is here!

When You Finally Understand Why Nothing Looks Right on Your Skin - Olive Skintones Part 2

Lifted Liner for Hooded, Uneven or Asymmetric Eyelids

The Beauty of Vulnerability - Getting Ready & Getting Real with Posy Sterling

Alexa Chung and the Viral Palette You’ve Been Waiting For

New Shades of Liquid Silks and Pinpoint, as requested by YOU!
My portfolio

Sophie Dahl - Harper's Bazaar - Agata Pospieszynska

Sophie Dahl - Harper's Bazaar - Agata Pospieszynska

Sophie Dahl - Harper's Bazaar - Agata Pospieszynska

Sophie Dahl - Harper's Bazaar - Agata Pospieszynska

Sophie Dahl - Harper's Bazaar - Agata Pospieszynska
New trend: sculpting and contouring sticks
Contouring continues to be a huge makeup trend, whether you're into it or not. If you are, there are lots of great contouring products available, from powders and compacts to creams and gels - very different to a few years ago, when contouring was much more of a makeup artist thing and specific contour products just didn't exist on the market. I've recently spotted lots of cream contour sticks, which is another big change as, when I was starting out in makeup, if you wanted to cream contour the only option was to use a foundation stick in a darker shade. I don’t think that these sticks are necessarily any easier to use than powders (as you still have to choose the right colour, apply the right amount and blend it in really well), but there are some benefits - the creamy formulas blend well with fingers or a brush and, if you apply too much, they’re a lot easier to take down than powders (although it’s always better to start with a little and build up slowly).
If you want to try one, there are a few points to remember. First up, like any cream makeup product, they should be used on top of another cream texture (foundation, BB cream, tinted moisturiser), not powder. Shade choice is also very important. Remember, contouring isn’t about adding colour, it’s about creating shadow - you want to mimic the way your skin looks when it’s in shade. So don’t choose anything too orange or red (especially if you’re fair), and better to use a non-shimmer texture. And though the temptation is to keep your head sideways, make sure that you look straight ahead from time to time to check you're not applying too far into your face and keep stepping back as, until you step away from the mirror, you can’t tell how much product you’ve got on. The bottom line is contouring needs to look as NATURAL as possible... no snickers bars please!
Here are some of the contour sticks that I’ve been trialling on shoots and at the #HouseofEldridge…
Nars Matte Multiple (1 - available in three contouring shades) has a soft, velvety texture that blends well but, as the stick is quite square, don't press it flat against your face which will leave you with thick stripes - instead, use the edges to feather it on with lots of little strokes that are much easier to blend together. A similar chunky crayon is Clinique Chubby Stick Sculpting Contour (2). It comes in one shade which has very low level pearl (but no sparkle) and a slightly golden quality, so it's good for anyone with yellow or olive undertones. The round shape makes it a little easier to use because it leaves less product on skin, but you should still apply with a very light touch.
Another one I like is Illamasqua Gel Sculpt in Silhouette (3). It only comes in one shade, and the gel texture means that the colour is very sheer (despite what it looks like in the packaging!). It won't show up on darker skintones but if you're fair it will leave you with a beautifully subtle, very natural contour.
For all the contouring pros, Smashbox Step-by-Step Contour Stick Trio (4) allows you to contour, bronze and highlight - but again, there’s only one colour option, so make sure the shades suit you before you invest (it’s best for light to medium complexions). I find that applying little crosses under your cheekbones, alternating between the Contour and Bronze pencils, gives a very natural result as long as you blend them together really well - the bronze helps to lift the darker contour to stop everything from looking muddy. You can use the Highlight pencil to highlight cheekbones, brow bones and the inner corners of your eyes too.
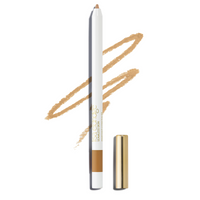
I’ve also spotted a few contour/highlight duo sticks. Nudestix Sculpting Pencil (5 - available in two shades) has a very creamy texture which is easy to blend, but avoid drawing on harsh, heavy lines as you will find it hard to blend out to a seamless finish. Little strokes or crosses (which are easy to create with the pencil) are much better. The light shade is very pale, so perfect for very fair skin, and the medium shade is quite yellow/golden, so good for olive skins or anyone with yellow undertones.
NYX Wonder Stick (6 - available in four shades) has a lovely creamy texture, good for a high street brand. It blends well, and the slim shape makes it easy to apply to different areas of your face, if you want to sculpt around your nose and jawline for example. The lower price point is also good for contour newbies who don't want to splash out (Lancôme Le Duo Stick is very similar and available in five fantastic shades - it's only available in the US but Sephora ships to other countries here).
When it comes to tools, you can use fingers to blend but I also like brushes. Avoid big, fluffy brushes as these won't give you the control you need - Zoeva’s Face Shape Brush works well as the small head and dense bristles makes it easy to blend your contour cream exactly where you want it. You could also use a foundation brush that has a bit of foundation left on the bristles, as the leftover base helps to remove any edges. Sweep the brush back and forward using light, feathery strokes for a seamless finish.
If you prefer powder contouring, watch my Basic Powder Contouring film below. I made it quite a while ago, but it has all the application tips that apply to contouring in general.
Top image
Photographer: Cuneyt Akeroglu
Model: Crista Cober
Hair: Akki Shirakawa
Styling: Lindsey Frugier
Nails: Shreen Gayle
Products I have used in this video:
Click below for more info and buying options on the products I have used in this film. Some of the links provided are affiliate links for which I will receive a small percentage payment for any purchases made.
Clinique - Chubby Stick Sculpting ContourIllamasqua - Gel Sculpt
Lancôme - Le Duo Contour and Highlight Stick
Nars - Matte Multiple
Nudestix - Sculpting Pencil
NYX - Wonder Stick
Smashbox - Step-by-Step Contour Stick Trio
ZOEVA - Face Shape Brush - 110


